Oil paint is one of the most widely used and versatile mediums in the world of art and commercial painting.
Known for its smooth finish, durability, and richness of color, oil paint is a favorite among both fine artists and house painters.
Do you want to create oil paint for artistic use or for your home improvement purposes? Understanding how to produce high quality oil paint can be both rewarding and profitable.
In this guide, we will explore the step-by-step process of producing oil paint.
From understanding the materials required to the production techniques, this guide will provide you with comprehensive insights if you are interested in making your oil-based paints.
What Is Oil Paint?
Before we begin, what exactly is oil paint?
Oil paint is a type of paint that uses oil, typically linseed oil, as the binding medium to hold pigment particles together.
It has been used for centuries, especially in fine art and construction, due to its rich color and long drying time, which allows artists to work on detailed techniques such as blending and glazing.
Oil paint is also known for its durability and can be used on various surfaces like canvas, wood, walls, and metal.
1. What Are The Composition Of Oil Paints?
Before we go into the production process properly, you must understand what oil paint is made of.
Oil paint is a slow-drying medium that consists of three main components.
1. Pigments
These refer to the color particles that give your paint its hue. Pigments are typically made from natural minerals or synthetic sources.
2. Binder
In the production of oil paint, the binder is typically a drying oil such as linseed oil. The binder holds the pigment particles together and adheres them to the surface being painted.
3. Solvent or Thinner
Solvents, such as turpentine or mineral spirits, are added to thin oil paint before application and to clean your brushes and other tools after use.
The solvent evaporates as the paint dries.
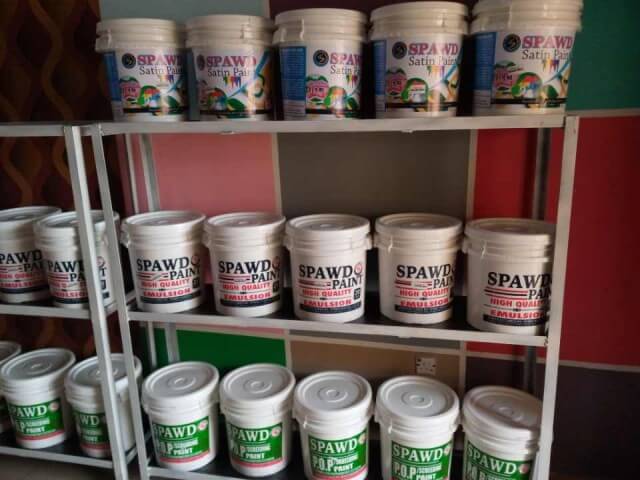
In some commercial oil paints like Spawd oil paint, additives are also included to modify the properties of the paint, such as improving durability or altering the drying time.
2. What Are The Materials Needed to Produce High-Quality Oil Paint?
To produce high-quality oil paint, you will need the following materials,
1. Pigments
Pigments come in many colors, and they can be sourced either naturally (such as from minerals or organic materials) or synthetically, that is (from chemical compounds).
You must use finely ground pigments to ensure a smooth texture for your paint.
Some common pigments include,
- Titanium White
This is a widely used white pigment that offers high opacity to your paint.
- Cobalt Blue
This is a vibrant blue pigment that is derived from cobalt salts.
- Cadmium Yellow
A bright yellow pigment that is durable and lightfast.
- Burnt Umber
This is a rich brown pigment derived from natural earth tones.
2. Linseed Oil
Linseed oil is the most commonly used binder in the production of high quality oil paints due to its drying properties.
Other oils that can be used include safflower oil, walnut oil, and poppy oil, but linseed oil remains the most popular choice for its durability and drying time.
3. Solvent (Turpentine or Mineral Spirits)
Solvents such as turpentine or mineral spirits are added when producing high quality oil paint to thin the consistency and make the application easier.
They are also used to clean brushes and tools after the painting process.
4. Grinding Tools
For you to properly mix and grind the pigments with the binder, you will need,
- Glass Slab
This is a smooth, flat surface where you grind the pigment and oil.
- Muller
This is a heavy, rounded tool made of glass or stone used to grind the pigment and oil into a smooth paste.
5. Containers
You will need small, airtight containers to store your finished oil paint. Metal or plastic tubes are commonly used, but glass jars with tight-fitting lids can also be suitable.
3. The Step-by-Step Process on How to Produce High-Quality Oil Paint
Now that you have an overview of the materials needed, let’s go through the step-by-step process on how to produce high-quality oil paint.
Step 1. Prepare Your Pigment
Before you begin mixing, ensure that your pigment is finely ground. If you are using a pre-made pigment powder, it may already be ground to the appropriate consistency.
However, if you are sourcing your pigments naturally, you may need additional grinding.
To grind your pigment,
Firstly, place a small amount of your pigment powder on the glass slab.
Then, use the muller to gently grind the pigment into a fine powder by rotating it in a circular motion.
Continue this process until the pigment has a smooth, fine consistency without any coarse particles.
Step 2. Add Your Binder (Linseed Oil)
Once your pigment is finely ground, the next step is to add linseed oil as the binder.
The ratio of pigment to oil depends on the desired consistency of the paint, but a typical ratio is approximately 1:1 by weight.
Place your finely ground pigment in a small pile on the glass slab.
Then, slowly add your linseed oil to the pigment using a dropper or small spoon. Start with a small amount, as you can always add more oil later if necessary.
Use your muller to gently mix the pigment and oil. Work the mixture into a smooth paste by grinding it in a circular motion.
Step 3. Grinding the Paint Very Well
Grinding the pigment and oil together is a crucial step in ensuring that the paint has a smooth, even consistency.
Continuously use your muller to grind the pigment and oil mixture until it reaches your desired smoothness.
This process may take some time, be patient, and note that it is essential to avoid any lumps or grainy texture.
As you grind, test the consistency of the paint by spreading a small amount onto a piece of paper, wall, or canvas.
If the paint is too thick, add a few more drops of linseed oil and continue grinding.
Note! The goal is to achieve a smooth, buttery texture that spreads easily but holds its shape without being too runny.
Step 4. Adjust the Consistency (Optional)
At this stage, you can adjust the consistency of the paint based on your needs.
For thicker paint, use less oil or add more pigment to the mixture.
Meanwhile, For thinner paint, add more linseed oil or a small amount of solvent (turpentine or mineral spirits).
If you are producing the paint for artistic purposes, you may also want to adjust the drying time by using different oils.
For instance, walnut oil dries more slowly than linseed oil, while poppy oil produces a less yellowing effect over time.
Step 5. Test Your Paint
Once you are sure the paint has reached your desired consistency, you must test it before storing or usage.
Apply a small amount of the paint to a surface to ensure it spreads evenly and has the proper opacity and texture you want.
Make any final adjustments to the paint if needed.
Step 6. Store Your Paint
After your paint is ready, transfer it into airtight containers for safe storage.
If you are producing the paint in large quantities, you may want to use metal tubes designed for oil paints.
Alternatively, glass jars or plastic containers with tight lids can also work well for you.
Label each container with the color and date of production, as oil paints can last for several years compared to water-based paint if stored properly.
4. What Are The Safety Considerations When Producing High Quality Oil Paint?
When you are working with oil paints and solvents, you must follow proper safety procedures.
So, here are some key safety tips you should keep in mind,
1. Ventilation
Always work in a well-ventilated area when using solvents like turpentine, as the fumes can be harmful to your health.
2. Protective Gear
3. Disposal
Properly dispose of any waste materials, including used rags and brushes, as they may be flammable when soaked with oil.
5. What Are The Required Additives and Modifiers In Producing High Quality Oil Paint?
Depending on the application and desired properties of your oil paint, you may want to add certain additives.
These include,
- Driers
You can add cobalt or manganese to speed up the drying process of your oil paint.
- Fillers
You can also add chalk or marble dust to increase the volume of your paint without affecting the color.
- Stabilizers
Some oil paints can include stabilizers to improve longevity and prevent separation of the oil and pigment over time.
6. The Difference Between Commercial and Homemade Oil Paint
While homemade oil paint can be a fulfilling project, there are some key differences between homemade and commercially produced oil paint.
- Consistency
Commercial oil paints are often more consistent in texture and quality, as they are produced using industrial machinery that ensures uniform grinding and mixing.
- Additives
Many commercial oil paints contain additives that enhance durability, improve drying time, and stabilize the paint.
These additives are not always available for homemade production, although you can always source them.
- Cost
Producing high-quality oil paint at home can be more cost-effective if you are making small quantities for personal use.
However, for large-scale projects or commercial purposes, it may be more efficient to purchase pre-made oil paints.
Conclusion
Learning how to produce high-quality oil paint is a rewarding and creative process that gives you full control over the quality and consistency of your paint.
Whether you are an artist seeking to experiment with custom colors or a DIY enthusiast interested in how to produce high-quality oil paint for home projects, this guide provides the essential steps to help you get started.
With the right materials, techniques, and patience, you can create high-quality oil paint tailored to your specific needs.
Just remember, by mastering this process, you can unlock a world of possibilities for artistic expression, home improvement, or even starting your own paint production business.
Happy production.


