When it comes to professional painting, the preparation of the wall is often more important than the actual painting process itself.
Proper wall preparation is the foundation for a smooth, professional-looking paint job that lasts.
This guide will walk beginners and professional painters through each step, from gathering supplies to applying primer, ensuring you achieve the best results with your paint project.
Why is Wall Preparation Important?
Before we dive into the actual steps of preparation, let’s stop to understand why it’s crucial.
Wall preparation is important to achieve the following,
It ensures your paint adheres well, and prevents peeling or flaking.
It smooths out imperfections, leading to a high-quality finish.
It also extends the life of your paint job by creating a more durable surface.
Skipping wall preparation might seem time-saving, but it often leads to frustration down the line when the paint doesn’t hold or looks uneven.
With careful preparation, you’ll enjoy a better-looking and longer-lasting paint job.
Step 1. Gather the Necessary Supplies
Preparation is key in more ways than one. So, start by collecting the right tools and materials for your wall preparation.
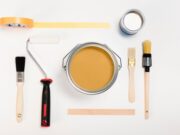
The Supplies Checklist
- Drop cloths or plastic sheeting.
- Painter’s tape.
- Scrapers and putty knife.
- Sandpaper (medium and fine grit).
- Sponges and cloths.
- Cleaning solution (mild detergent or TSP – trisodium phosphate).
- Patch compound or spackle.
- Caulk and caulking gun.
- Primer (appropriate for the type of paint you’ll be using).
- Safety goggles, gloves, and a dust mask.
- Ladder (if needed).
Having all these supplies ready will make the preparation and painting process smoother, reducing interruptions and helping you work efficiently.
Step 2. Clear and Protect the Area
Before you start, remove all furniture and items from the area to avoid damage and allow you to work freely.
For larger furniture pieces that are hard to move, you can cover them with your plastic sheeting or drop cloths.
Also, protect the floor by laying down a drop cloth or canvas tarp.
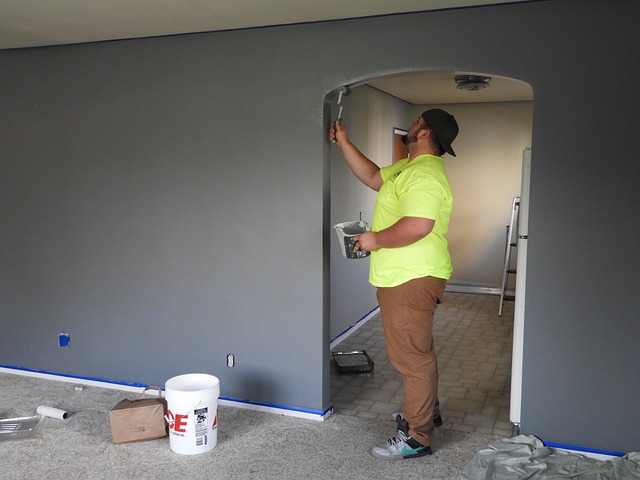
Use your painter’s tape to cover light switches, electrical outlets, trim, and other areas you don’t want to paint.
Taping off edges is particularly useful in areas where the wall meets the ceiling, to ensure sharp, professional-looking lines when you apply the paint.
Step 3. Inspect and Repair Wall Surfaces
Inspection is a key step. Walk along the wall and identify any holes, cracks, dents, or nail pops.
Wall imperfections can interfere with the final appearance of your paint, so it’s essential to address them.
Use your putty knife to fill small holes or cracks with spackling paste. While for larger holes, you may need to use a patch kit. Make sure to follow the manufacturer’s instructions for drying time.
If you see a nail that has popped out, remove it and replace it with a slightly longer drywall screw in the same place.
Once the spackle or patch compound has dried, sand it down with fine-grit sandpaper. Sanding smooths out the patch, blending it with the rest of the wall.
After sanding, use a damp cloth or sponge to remove any dust or debris. Dust and dirt can prevent the primer and paint from adhering properly.
Step 4. Clean the Walls Thoroughly
Cleaning the walls removes dirt, grime, and oils that could interfere with your paint adhesion. Use a mild detergent solution or a TSP (trisodium phosphate) cleaner for more thorough cleaning.
Steps for Cleaning
- Prepare the Solution
Follow the instructions on the cleaner’s label to mix it with water.
- Wipe Down the Walls
Use a sponge or rag to scrub down the entire wall surface. Pay special attention to high-touch areas that may have more grime, such as around light switches or near door frames.
- Rinse the wall with Clean Water
After scrubbing, rinse the walls with a clean sponge and water to remove any cleaner residue.
- Let the Walls Dry Completely
Allow the walls to dry thoroughly before moving to the next step. Note that If the walls are still damp, the paint may not adhere properly.
Step 5. Sand the Wall Surface
Sanding the walls lightly can improve your paint adhesion and create a smoother surface. It’s particularly important if,
You’re painting over glossy or semi-gloss paint.
The wall has visible rough patches or texture.
You’ve applied spackle or patch compound.
Use medium-grit sandpaper for rougher patches and fine-grit sandpaper for a smooth finish. For large areas, a sanding pole can help you reach higher sections comfortably.
Pro Tips
Always wear a dust mask while sanding to protect yourself from inhaling dust.
Sand in a circular motion and avoid putting too much pressure to prevent uneven spots.
Step 6. Deal with Stains and Mildew
Stains such as watermarks, smoke residue, and mildew should be addressed before painting, as they can bleed through the new paint layer.
To help you remove the stains, use a mixture of water and vinegar or a TSP solution to scrub away any stains on the wall.
If you see mildew, mix one part bleach with three parts water and apply it to the affected area.
Let it sit for a few minutes before scrubbing and rinsing thoroughly. Make sure the area is well-ventilated during this process.
Step 7. Caulk Gaps and Seams
Caulking is essential for sealing small gaps between walls, trim, and around windows and doors.
Gaps can look unappealing once painted and can also allow drafts or moisture into the wall.
Use a paintable, flexible caulk for walls and trim.
Using a caulking gun, run a bead of caulk along any visible seams or gaps.
Then use a wet finger or a caulk finishing tool to smooth out the bead, wiping away excess caulk.
Allow the caulk to dry fully before applying primer or paint. This step will create a seamless, professional-looking result.
Step 8. Apply Primer
Applying primer is one of the most critical steps in wall preparation. Primer creates a uniform surface for the paint, ensuring the color looks even and adheres well.
When to Use Primer
When working on an unpainted or bare wall
Primer is essential for new drywall or plaster.
When you have stained or damaged walls
If you’ve cleaned stains or have water damage, a primer will help block them from seeping through the paint.
When switching colors
If you’re making a drastic color change, like from red to white or silver gray, primer helps create a neutral base for better coverage.
How to Apply Primer
Choose the Right Primer
Use a primer designed for your wall type. Water-based primer works well for most interior walls, while oil-based primer is effective on stained areas or high-moisture areas.
Roll the Primer Evenly
Apply the primer evenly using a roller, starting from the top and working your way down. Use a brush for the edges.
Allow Time to Dry
Follow the manufacturer’s recommendations for drying time, usually between 1-4 hours.
Step 9. Final Check Before Painting
Before diving into your paint job, inspect the walls one last time.
Ensure all the patches are blended, and there are no remaining rough spots.
Also, ensure that the primer has dried completely.
Wipe off any remaining dust or residue that could affect your paint adhesion.
Additional Tips for a Successful Paint Job
Ventilate the Room
Ensure proper ventilation to prevent fumes from building up and to help the primer and paint dry faster.
Choose Quality Paint and Brushes
Test Your Paint Color
Before covering the entire wall, apply a small amount of the paint to check that it appears as expected in your lighting.
Conclusion
Proper wall preparation is a crucial step in any painting project.
By taking the time to clean, repair, sand, and prime your walls, you’ll set the foundation for a beautiful and long-lasting paint job.
Although these steps may seem extensive, each one contributes to the overall success of your project.
Remember, a professional paint job is built on preparation. So follow these steps carefully, and you’ll achieve a professional finish, even as a beginner.
Happy painting.


