Maintaining the cleanliness of painted walls is essential for keeping your home looking fresh and inviting.
Over time, walls accumulate dirt, fingerprints, stains, and even scuffs. Cleaning painted walls might seem daunting, especially if you’re worried about damaging the paint.
However, with the right approach, tools, and techniques, you can restore your walls to their original glory without compromising the paint’s integrity.
In this guide, we’ll walk you through a comprehensive step-by-step process of cleaning your painted walls safely and effectively.
Identifying Your Wall Paint Finish
Before we go into the cleaning process properly, it’s important to identify the type of paint finish on your walls.
Different finishes react differently to cleaning, so knowing this will help you determine the best cleaning method.
1. Matte/Flat Finish
Matte finishes have a low sheen and are more prone to showing stains and marks. They’re delicate, so gentle cleaning methods are essential for matte finishes.
2. Eggshell Finish
Slightly more durable than matte, eggshell finishes have a subtle sheen and can handle mild cleaning.
3. Satin Finish
Satin finishes have a soft shine and are more resistant to moisture and stains, making them easier to clean.
4. Semi-Gloss and Glossy Finishes
These finishes are the most durable and can withstand more rigorous cleaning. They’re often used in kitchens and bathrooms where walls are more prone to grime.
Tools and Materials You’ll Need To Clean Your Painted Walls

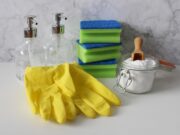
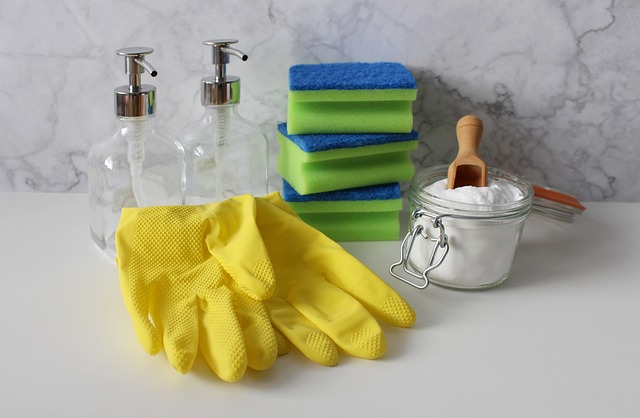
Having the right tools and materials on hand will make the cleaning process smoother and more effective.
Here’s what you’ll need to commence the cleaning.
- Soft microfiber cloths or sponges
- A bucket of warm water
- Mild dish soap
- White vinegar (optional, for tougher stains)
- Baking soda (for stubborn marks)
- Magic eraser (use sparingly on sensitive finishes)
- Soft-bristled brush or toothbrush
- Dry towels
- Step stool or ladder (for hard-to-reach areas)
Step-by-Step Guide to Cleaning Painted Walls
1. Prepare the Area You Want To Clean
Start by preparing your workspace to prevent any accidental messes.
- Move Furniture
Shift furniture away from the walls to create enough space for cleaning.
- Cover the Floor
Place drop cloths or old towels along the base of the wall to catch any drips or spills.
- Dust the Wall
Use a microfiber cloth, a duster, or the soft brush attachment on your vacuum cleaner to remove loose dust and cobwebs from the wall.
2. Spot Test the Cleaning Solution
To avoid damaging the paint, always test your cleaning solution on a small, inconspicuous area of the wall first.
Apply the solution, let it sit for a few minutes, and then wipe it off. Check for discoloration or paint peeling before proceeding.
3. Start with Gentle Cleaning
For light dirt and smudges, start with the gentlest cleaning method.
Fill your bucket with warm water and add a few drops of mild dish soap.
Dip your microfiber cloth or sponge into the soapy water, wring it out well to avoid excess moisture, and gently wipe the wall in a circular motion.
Rinse the cloth frequently and replace the soapy water if it becomes too dirty.
4. To Tackle Tougher Stains
For more stubborn stains, step up the cleaning intensity while still being cautious.
- White Vinegar Solution
Mix one part of white vinegar with three parts warm water. This solution works well for greasy spots or fingerprints.
- Baking Soda Paste
Combine baking soda with water to form a paste. Apply it to the stain using a soft cloth, gently scrub in a circular motion, and then wipe clean with a damp cloth.
- Magic Eraser
For marks like crayons or scuffs, dampen a magic eraser and lightly rub the affected area.
Be cautious, as these erasers can sometimes dull the paint’s finish.
5. Clean High-Traffic Areas
High-traffic areas such as hallways or around light switches tend to accumulate more grime.
- Pay extra attention to these spots, and use a slightly stronger cleaning solution if necessary.
- For textured walls, use a soft bristled brush to reach into crevices.
6. Dry the Walls
Avoid leaving the walls damp, as excess moisture can damage the paint or encourage mold growth.
- Use a clean, dry towel to pat the walls dry after cleaning.
- Open windows or use fans to improve ventilation and speed up drying.
Special Considerations for Different Types of Stains
1. Grease Stains
Common in kitchens, grease stains can be removed using a solution of dish soap and vinegar. For tougher spots, try a degreaser that is safe for painted surfaces.
2. Scuff Marks
These can often be erased using a damp magic eraser or a paste of baking soda and water.
3. Crayon Marks
Gently scrub with a magic eraser or apply a small amount of toothpaste to the mark, then wipe clean.
4. Mold or Mildew
Mix one part bleach with three parts water and carefully apply it to the affected area. Rinse thoroughly and dry.
Preventative Measures to Keep Your Painted Walls Clean
1. Regular Dusting
Dust your walls periodically to prevent buildup.
2. Wash High-Traffic Areas Monthly
Keep areas like doorways and light switches clean to avoid deep stains.
3. Use Door Mats
Reduce dirt transfer by placing mats at entrances.
4. Avoid Harsh Cleaners
Stick to mild cleaners to protect the paint.
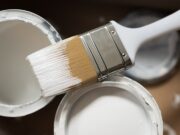
5. Apply Touch-Ups
Keep extra paint on hand for quick touch-ups on areas with chipped or worn paint.
Common Mistakes to Avoid When Cleaning Painted Walls
1. Using Abrasive Tools
Steel wool or harsh scrubbing brushes can scratch the paint.
2. Soaking the Wall
Too much water can damage both the paint and the drywall beneath.
3. Skipping the Spot Test
Always test cleaning solutions to avoid surprises.
4. Ignoring Drying
Never leave the walls wet after cleaning.
5. Overusing Magic Erasers
While effective, frequent use can wear down the paint.
When to Repaint After Cleaning Your Painted Walls
If cleaning doesn’t restore the walls’ appearance, it might be time to consider repainting.
This is especially true for matte or flat finishes that show wear more easily. Opt for higher-quality paint with a washable finish to make future maintenance easier.
Conclusion
Cleaning painted walls doesn’t have to be a daunting task.
By understanding your paint type, using the right tools, and following the techniques we shared correctly, you can safely and effectively maintain your walls’ appearance.
Regular care not only keeps your home looking its best but also extends the life of your paint job.
With this comprehensive guide, you’re equipped to tackle any wall-cleaning challenge with confidence.

