Learning how to produce high-quality emulsion paint at home can be highly rewarding and cost-effective.
Most especially, when you’re looking to save money, customize your paint colours, or start a small paint business, the process is surprisingly straightforward.
In this step-by-step guide, we’ll take you through each step required to produce high-quality emulsion paint at home.
We’ll ensure that you understand the materials needed, tools, accurate chemical measurements, and techniques necessary for success.
So What Is Emulsion Paint?
Emulsion paint is a water-based paint that is widely used by house owners and professional painters for interior and exterior walls, ceilings, and other surfaces.
It is also known for its durability, ease of application, quick drying time, and low odor.
Emulsion paint is versatile and can be customized into a variety of colours and finishes.
All the above mentioned makes it a popular choice for both professional painters, home owners, and DIY enthusiasts.
One of the key advantages why most people including me, prefer to use emulsion paint is its environmental friendliness.
Because it is water-based, it emits fewer volatile organic compounds (VOCs) compared to oil-based paints.
These characteristics make it safer for indoor use and more environmentally sustainable.
Understanding the Basics Of Emulsion Paint
Before we dive into the production process properly, it’s important to understand the basics of Emulsion Paint.
We have four major primary components that make up emulsion paint.
What Are The Components of Emulsion Paint?
The components of emulsion paint are referred to those materials or chemicals that are used in the production of Emulsion Paint and they are as follows.
- Binders
The binder is the film-forming component of the paint.
It is responsible for binding the pigment particles together and adhering them to the painted surface.
Basically, it serves as the gum in your paint.
Common binders used in emulsion paints include acrylic resins, vinyl acetate copolymers, and styrene-butadiene latex.
Note!
The type and quality of the binder you use will greatly influence the durability and finish of your paint, so make sure you always use the best binders for a good result.
- Pigments
Pigments on the other hand are the colorants in emulsion paint.
They are finely ground particles that provide colour and opacity to the paint.
They are divided into two categories: prime pigments and extender pigments.
Prime pigments, such as titanium dioxide, provide the paint with its primary color and opacity, while extender pigments, like calcium carbonate or talc, enhance the paint’s thickness, texture, and coverage.
Please note this!
We have 2 types of colour pigments.
1. Paste.
This colour pigment comes in a liquid foam. Mostly direct use.
2. Oxide.
The Oxide colour pigment comes in a powder foam. You need to thin it to a paste form before use unless you are using a machine on the highest speed.
- Solvents (Water)
In the production of emulsion paint, water acts as the solvent, thinning the paint for application.
As the paint dries, the water evaporates, allowing the binder to form a continuous film on the surface.
The amount of water you use will influence the viscosity of the paint, so it’s important you strike a balance to ensure a smooth application and proper drying time.
- Additives
Additives are the materials or chemicals added to the paint to enhance certain properties, such as flow or coverage, drying time, and resistance to mildew.
The common additives we use include thickeners, defoamers, dispersants, and preservatives.
While some additives are not always necessary, they can greatly improve the performance and longevity of your paint.
I advice you always use it.
What Are The Tools and Materials Needed To Produce High Quality Emulsion Paint?
In order to produce a high-quality emulsion paint at home, you’ll need the following tools and materials.
Materials.
You need your Acrylic or vinyl acetate binder (latex).
Titanium dioxide (you use more when producing brilliant white).
Color pigments (only for colored paint).
Water (preferably use distilled water).
Calcium carbonate or talc (as an extender pigment and main body of the paint).
Additives (example, dispersant, defoamer, thickener, and preservative).
For the production of 1 bucket of high-quality emulsion paint, the following quantity of raw materials is required.
Measurements of chemicals
Water = 10 liters
TiO2 = 1kg
CaCO3 = 15kg
Biocide = 100 gram
Calgon – 100 gram
Deformer or Kerosene = 100 gram
Hydrocellulose ether = 100 gram
PVA = 3.5kg
Ammonia = 100 gram
Genniple = 0.5kg
Defoamer = 0.5kg
Texanol = 250gram
Pigments = Depends on your choice of colours
Tools.
You need a large mixing container (plastic or stainless steel).
A mechanical mixer or paint stirrer.
Measuring cups or a digital scale.
A fine mesh filter or sieve.
Storage containers with tight lids.
And lastly, your protective gloves and safety glasses.
The Step-by-Step Guide on How to Produce High Quality Emulsion Paint at Home.
Step 1.
Prepare Your Work Area.
Before you start your production properly, It’s important to prepare your work area first.
Make sure you choose a well-ventilated space with ample room for mixing and storage.
Then cover the work surface with a drop sheet or newspapers to protect it from spills.
Ensure you have all your tools and materials organized and within reach.
Wear your protective gloves and safety glasses to avoid direct contact with the chemicals.
If you are working with pigments, it’s advisable to wear a dust mask to prevent inhalation.
Step 2.
Measuring and Mixing the Binder
The binder is the foundation of your paint, so it’s essential to measure it accurately before use.
For a standard batch of emulsion paint, you will need approximately 30-35% binder by volume like I mentioned above.
The exact amount will depend on your desired finish and application method.
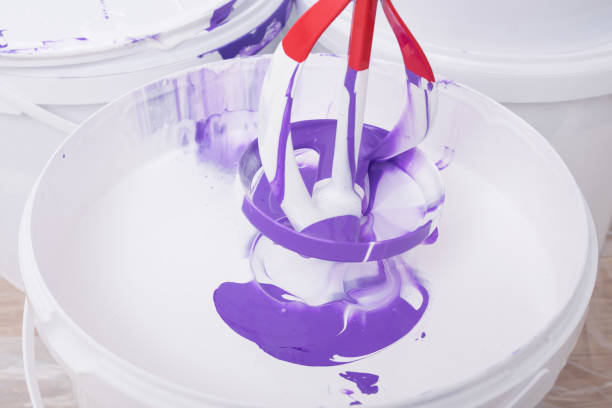
Then pour the binder into your mixing container and begin stirring with a mechanical mixer or paint stirrer.
The mixing process should be slow and steady to avoid introducing air bubbles into the mixture.
Step 3.
Add Your Pigments
Next, add your measured titanium dioxide to the binder.
Titanium dioxide is the most commonly used white pigment due to its excellent coverage and brightness.
Just like in the production of satin paint.
The amount of titanium dioxide needed will depend on the level of opacity and whiteness you desire.
For a high-quality white emulsion paint, use approximately 15-25% titanium dioxide by volume.
If you’re producing a coloured paint, this is the time to add your colour pigments.
When adding your colour pigments, you should do that gradually, and the mixture should be stirred continuously to ensure even dispersion.
Remember!
The amount of pigment you use will vary depending on the shade you want to achieve.
Step 4.
Add your Additives
Additives play an important role in enhancing the performance of your paint.
So, start by adding a dispersant to ensure the pigments are evenly distributed in the mixture.
Next, add your defoamer to prevent or reduce the formation of air bubbles during mixing.
If you’re concerned about the drying time, you can add a drying agent to accelerate the drying process.
Lastly, add your preservative to prevent the growth of mold or bacteria in the paint.
Preservatives are also very important, especially when you are not producing for immediate use.
Step 5.
Adjusting the Viscosity
The viscosity here refers to the paint’s thickness.
This affects how your paint will flow and spread on a surface during application.
If your paint is too thick, you can thin it by adding water gradually until you reach the desired consistency.
If it’s too thin, you can also thicken it by adding a thickener, such as cellulose or a similar product.
Note!
Viscosity can also be influenced by the temperature of the paint.
So, If the paint is too cold, it may thicken more, and if it’s too warm, it may become too runny, light or watery.
Aim to keep the paint at room temperature during production.
Step 6.
Filtering and Packaging
At this point, your paint is ready for use or application.
Once the paint is fully mixed and the viscosity is adjusted, it’s time to filter out any impurities or lumps in the paint.
Use a fine mesh filter or sieve to strain the paint into a clean container.
This step ensures that your paint has a smooth texture and will apply evenly to surfaces during application.
After filtering, if you produced the paint for immediate use, then,
Congratulations!
Your high quality emulsion paint is ready for use.
But if you are producing for later use or for sale, pour your paint into storage containers with tight-fitting lids.
Store the paint in a cool, dry place, away from direct sunlight.
General Guidelines Before And During Production
1. Always measure all your chemicals adequately down before you start production so that it speeds up your production
2. Always pre-disperse your colour oxide with water to form a paste in a separate bowl before adding it to your production to avoid lumps.
Although, this is only done when you are producing water based paints because you don’t need to pre-disperse paste colour for oil-based paints.
3. Always pre-disperse your Natrosol with at least 1 kg of water before adding it to your production to avoid lumps and easy mixture too.
4. Note that, you don’t use aluminum silicate for colour paints because it will kill off the color no matter the amount of colour you add.
Your paint might remain white or the colour will be light, and will not get the desired deep colour.
For any white colour paint production use 1kg of it.
5. Note!,
You don’t buy white colour from the market, if you want to produce white colour paint, all the chemicals needed are already in white form so that will automatically give you white colour paint.
6. Calcium carbonate has two types. Off-white and Brilliant white, so always use pure white only for white colour paints and off-white for colour paints.
If you use off white for white colour paint your product will not be bright.
7. Always use the accurate quantity of each chemical I mentioned above to obtain a high quality product.
8. Never mix up water-based paint chemicals and oil-based paint chemicals.
You will regret it!
Common Mistakes to Avoid When Producing High Quality Emulsion Paint
- Over-Thinning
Adding too much water can weaken the paint, leading to poor coverage and durability.
- Inadequate Mixing
Failing to mix the ingredients thoroughly can result in an uneven finish and can reduce paint performance.
- Skipping the Filtering Step
Filtering is essential to remove impurities that can cause lumps or streaks in the paint.
- Ignoring Additives
While additives are not mandatory if you are producing for immediate use, they can greatly improve the quality and longevity of your paint, so don’t overlook them.
Conclusion
Like I’ve earlier said, learning how to produce high-quality emulsion paint at home is a practical and rewarding skill that offers numerous benefits.
It gives you the leverage of customizing colours for personal use and also exploring a small business opportunity at home.
Following this step-by-step guide will help you create paint that meets your needs and exceeds your expectations.
By understanding the components of emulsion paint, using the right tools and materials, and following this detailed production process, you can produce paint that rivals commercial products in quality and performance.
Remember, practice makes perfect.
Hope this was helpful.


