Painting or repainting your home can be a rewarding and cost-effective way to transform your space.
Employing the right house painting techniques can make all the difference between a professional-looking finish and a shabby job.
House painting might seem intimidating for some homeowners and beginners, but anyone can achieve impressive results with proper guidance and preparation.
This comprehensive guide will walk you through modern painting techniques for beginners and house owners.
It also covers everything from preparation to the final touch-ups.
Before diving right into it, let us look at some basics.
- What Are The Basics of House Painting?
1. Types of Paint
Before you begin, it’s important to understand the different types of paint available. The two most common types we use are.
- Water-based paints
Water-based paints are the most popular choice for interior and exterior walls and ceilings. They dry quickly and have a low odor.
- Oil-Based Paints
Oil-based paints are more durable and provide a smoother finish, making them ideal for trim, doors, and cabinets.
However, they take a longer period to dry, have a strong odor, and require mineral spirits for tanning and cleanup.
2. Choosing the Right Finish
Hear this if you are a beginner!
The finish of the paint you choose for your project can greatly affect the appearance and durability of the painted surface.
This is very important especially when you are a beginner.
Here are some common paint finishes.
- Flat/Matte
This finish is normally Non-reflective and hides imperfections on the wall or surface, but is less durable and harder to clean.
- Eggshell
This finish is slightly reflective, offers better durability, and is easier to clean.
- Satin
The satin finish is a popular choice for walls, it has a soft sheen, excellent durability, and is pretty easy to clean.
- Semi-Gloss
This finish is more reflective and durable, it is an ideal paint for your kitchens, bathrooms, and trim.
- Gloss
The gloss paint finish is a highly reflective paint, super durable, and easy to clean, but it usually highlights imperfections on the walls.
- Preparation Techniques
Preparation is key if you must achieve a professional finish in your project.
Similarly, applying modern painting technique in your project can change your painting narrative.
So, take note of these two preparations that are necessary for success.
1. Gathering Your Materials and Tools For Painting
As a beginner painter, before you commence applying the modern painting technique in your work, know that having the right tools and materials readily available is crucial for a successful painting project.
Here’s a checklist of essential materials you need to have on the ground before you begin your panting.
- Paint
Paint is the major material you need, so choose the right type of paint and finish for your project if you desire excellence.
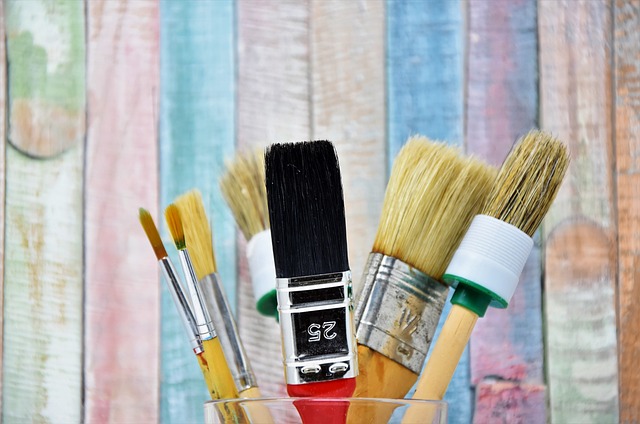
- Paintbrushes
To achieve professional work, I advise you to get high-quality brushes in various sizes for cutting in and detailed work.
This is very important, they play a vital role in achieving a professional finish.
- Rollers
Get different sizes of rollers for large surfaces and special rollers for textured walls.
I advise you to get separate rollers for your ceiling and walls, doing this will you help speed up your project time.
- Painter’s Tape
Using painter’s tape is not negotiable if you must protect edges and create clean straight lines in your project.
Always use them because they give you that professional finish.
- Drop Cloths or Drop sheets
This is a very crucial tool for success in painting, protecting your floors and furniture from drips and splatter is important.
This alone can prove your professionalism.
- Sandpaper
You need a smooth sandpaper for smoothing the surfaces before you start painting.
Especially when you screed the walls to be painted, even without screeding the walls, you need to sand them to have a highly smooth and professional finish.
- Trowel and Scraper
These tools are very important, you need them for filling holes and cracks on the walls before painting.
- Primer
Primer is essential for preparing the surface, especially if you’re painting over a dark color, new wall, or bare wood.
- Ladder
The ladder is important for reaching high areas safely.
Some painters use buckets and other means, but this is usually risky, so I don’t advise you to.
- Paint Tray and Liners
You need these tools to hold your paint while you work.
- Stirring Sticks
You need a stirring stick to mix the paint thoroughly.
Some paint comes quite thick so you need to stir it before use.
In some cases, you need it when mixing different colors of paint.
- Clean Water and Rags
Clean water and rags are for cleaning up spills and wiping down stained surfaces.
2. How to Prepare the Room or Space Before Painting
Proper preparation before painting is essential for achieving a smooth, and professional finish.
Follow these steps to prepare your room or space before painting, and you’ll be amazed at your final result.
- Clear the Area
Before you start painting, remove all furniture, or cover it with your drop cloths.
Take down any wall decor, and curtains, and tape light switch covers.
- Clean the Walls
Cleaning the wall before painting is important for achieving a professional finish.
So, use a broom to remove all dust, dirt, and grease from the walls. This also helps the paint adhere better to the wall.
- Fix all Imperfections on the wall
Use your trowel and scrapper to fill in all the holes, cracks, and dents on the wall and surface.
Once dry, sand the patched areas smoothly, this is essential for a professional finish.
- Sand the Surfaces
Apart from where you have initially filled up, lightly sand the entire walls to create a smooth and even surface for the paint.
This is especially important if the walls are new or have a glossy finish.
- Apply Your Painter’s Tape
Applying painter’s tape helps you protect edges, trim, and any areas you don’t want to paint.
Make sure to press the tape down firmly to prevent paint from seeping underneath.
Lastly, remove the tape immediately after applying your second coat.
- Prime the Walls
If you’re painting over a dark color, raw wood, or a surface that has never been painted, please, apply a coat of primer.
Primer helps the paint adhere better and ensures a uniform finish.
- Professional Techniques for Applying Paint
1. Cutting In
“Cutting in”?
This refers to painting the edges of walls, around windows, doors, and trim, particularly where your rollers can’t reach.
Some painters do this last, but I advise you as a professional painter, you should do your cutting first before the main painting.
Here’s how to do it.
- Use a Quality Brush
As an aspiring or professional painter, always use quality brushes for your project.
For pro cutting, I advise you to get a 2 or 2.5-inch angled brush, it works best for cutting in areas.
- Load the Brush with paint Properly
Gradually dip your brush about a third of the way into your paint, tap off excess paint on the side of the can you are using, and avoid overloading the brush with paint to prevent spill and stains.
- Paint in Sections
Work in small sections, starting from the top corner of the wall.
Paint it down with the brush, draw a straight line along the edge with your paint, then feather the paint inward to blend it with the roller-applied paint later.
This is important in blending the lines your brush bristol will leave.
- Keep a Wet Edge
To avoid visible brush marks, work quickly and try to keep a wet edge.
This means don’t let the paint dry before blending it with the cutting in section.
This is very important in blending both the cutting area and the rolling areas.
2. Using Your Roller
We all know that rollers are ideal for covering large surfaces like your walls and ceilings quickly and evenly.
With that being established, follow these steps for a smooth and professional application.
- Choose the Right Roller for Your Project
The roller you use for your project can significantly affect the final finish.
So, the thickness of the roller you choose should match the texture of your walls.
Light hair rollers are more suitable for most interior walls, while the thicker ones are better for textured surfaces.
- Load your Roller with paint evenly
Pour paint into your tray, then roll the roller into the paint. Roll it back and forth on the tray’s ramp to evenly distribute the paint on the roller and remove excess.
- Apply your Paint in a “W” Pattern
This is very important as a professional, start your painting by rolling the paint onto the wall in a large “W” pattern.
This technique helps to distribute the paint evenly on the wall and prevents roller marks.
Then, fill in the gaps by rolling back over the “W” without lifting the roller.
Do this continually till you cover up the whole wall or ceiling.
- Work in Small Sections
Divide the wall into manageable sections as you progress painting from top to bottom.
This ensures that the paint doesn’t dry before you have a chance to blend the edges.
- Maintain a Wet Edge
Similar to cutting in, always work with a wet edge to avoid lap marks.
This means you should overlap slightly with the previously painted area before it dries.
This helps to give an even-painted wall when dry.
- Feather the Edges
As you approach the edges of a section, please use less pressure to lightly feather the paint.
This helps to blend the area seamlessly with the adjacent area.
3. Painting the Ceiling
Note!
In modern painting techniques, you start with painting your ceiling before painting your walls.
Painting the ceiling before the walls can help you prevent drips and splatters from ruining your wall paint.
Here’s how to tackle it.
- Use Ceiling Paint
Always use recommended ceiling paint when painting your ceilings.
Ceiling paint is thicker and less likely to drip, making it easier to achieve a uniform finish.
- Cut in Around the Edges
Just like with walls, start by cutting in along the edges where the ceiling meets the walls.
It makes it easier to achieve a pro finish with ease.
- Roll the Paint
Use your roller with an extension pole to reach the ceiling. Then apply the paint in parallel strokes, moving across the ceiling in sections.
Overlap each stroke slightly to ensure even coverage and repeat the process till you cover the entire ceiling.
4. Painting Your Trim and Doors
Professionally, trim and doors require a different approach to achieve a smooth, glossy finish:
- Sand and Clean
Lightly sandpaper the trim and door areas to smooth out any imperfections.
Then wipe the surfaces with a dry and clean brush to remove dust.
- Prime if Necessary
If the trim or doors are bare wood or a dark color, like I’ve said earlier, apply a coat of primer to achieve a professional finish.
As a pro, using quality tools is non-negotiable.
A high-quality, angled brush is ideal for painting trim and doors.
As you commence, load your brush with moderate paint, then apply it in long, smooth strokes. Avoid overloading the brush to prevent drips.
- Paint in Sections
For your doors, paint in sections, starting with the recessed panels (if any) and moving to the surrounding frame.
While, for trim, start at the top and work your way down.
- Tips for Achieving a Professional Finish
1 Don’t Rush the Process
One of the biggest mistakes beginners make is rushing through the painting process.
To achieve a professional finish, always take your time to ensure each painting step i mentioned step is done properly, from preparation to the final touch-ups.
2 Apply 2 or 3 Coats if Necessary
For the best coverage and a rich, even color, plan to apply at least two and if necessary three coats of paint.
Make sure you allow each coat to dry completely before applying the next coat.
3. Remove Your Painter’s Tape Before the Paint Dries
To achieve clean, sharp lines, remove the painter’s tape while the paint is still slightly wet.
If the paint has dried, use a sharp utility knife to score along the edge before peeling off the tape.
Allowing the paint to dry before removing your painter’s tape can sometimes affect the painted areas in the process.
4. Clean Up Properly
Always clean your brushes, rollers, and other tools immediately after painting to keep them in good condition for future use.
If you use water-based paint, clean your tools with warm, soapy water. For oil-based paint, use mineral spirits, paint thinner or petrol.
- Final Touch-Ups and Maintenance
1. Inspect for Imperfections
Once your paint has dried, always inspect the surfaces for any missed spots, drips, or uneven coverage.
If there is, touch up these areas with a small brush or roller and paint.
2. Proper Ventilation
Always allow your painted room or space to ventilate properly by keeping your windows open or using fans.
This helps the paint cure faster and reduces odors especially when you use oil paint.
3. Clean the Painted Surfaces
After an hour or more, once your paint has fully cured, gently clean the surfaces with a damp cloth or sponge to remove any dust or smudges on the floorings.
4. Regular Maintenance
To keep your newly painted walls and ceilings looking fresh always, perform a regular maintenance by wiping down walls, trim, and doors as needed.
Address any scuffs or marks promptly to prevent further or permanent damage.
Conclusion
Completing your painting project on a professional level can be gratifying.
Looking at how you apply modern painting technique to enhance the appearance of your room or space is equally fulfilling.
By following these beginner-friendly techniques, you can achieve a professional-looking finish that you’ll be proud of.
Remember that preparation is key, and taking your time through each step will lead to the best results.
Whether you’re tackling a small room or an entire house, these tips will help you navigate the process with confidence and skill.
Happy painting!
I hope this was helpful.


